
Blog
Broken glass, chemical splashes, burns, and pressure-related failures often begin with small handling errors. A chipped rim goes unnoticed, a cold flask meets a hot surface, or tubing is forced onto a dry connector. Preventing common accidents with lab glassware requires suitable equipment, routine inspection, controlled heating and pressure practices, and a consistent response to breakage. The guidance below helps laboratory managers, technicians, educators, and procurement teams apply those controls.
Glass is chemically useful, but damage can be difficult to see. Scratches, star cracks, chipped joints, and stressed edges concentrate force. Heat, vacuum, pressure, impact, or twisting can turn a minor defect into sudden failure involving sharp fragments and the vessel's contents.
Start by matching the item to the procedure. A vessel intended for ordinary mixing should not automatically be used for vacuum, pressure, direct flame, or rapid temperature change. Confirm the intended use, glass type, temperature limits, pressure or vacuum rating, joint geometry, and chemical compatibility before approving an item for a method.
Examine clean, dry glassware under good lighting. Rotate it slowly and check the rim, base, sidewall, neck, stopcock, and ground-glass joints. Reject pieces with chips, cracks, deep scratches, cloudy stress marks, damaged graduations that affect measurement, or joints that no longer fit correctly. Do not repair load-bearing or pressure-exposed glassware with tape or adhesive.
A simple status system prevents rejected items from returning to circulation. Move damaged pieces to a labeled holding area, record recurring failures, and review whether washing racks, storage, transport, or incompatible fittings are causing damage. When sourcing replacements, compare the lab porcelain and glassware range by application rather than familiar shape.
Keep the bench dry, uncluttered, and free of items that can catch a vessel or obstruct an emergency response. Place glassware away from bench edges and route hoses so they cannot pull an apparatus over. Use stable clamps and supports; never rely on a narrow neck, stopper, or tubing connection to carry the weight of an assembly.
Laboratory coats, closed shoes, and eye protection form the basic barrier for routine handling. Select gloves for the hazard. Chemical-resistant gloves may provide little cut resistance, while cut-resistant gloves may not resist the chemical in use. Heat-resistant gloves are needed for hot glass, which can look cold. The risk assessment should define the required combination.
Glass tubing and thermometers commonly break when pushed through stoppers. Check both parts for damage, make sure the hole size is suitable, lubricate the glass where the procedure permits, and protect the hands with a towel or appropriate gloves. Hold the glass close to the insertion point and use a gentle twisting motion. Never push with the palm directly behind the glass end.
Use purpose-made connectors when repeated assembly is expected. Secure hoses with the correct fitting and avoid side loads on glass nipples. For measured liquid transfer, choose the right tool instead of improvising: a measuring pipette supports graduated delivery, while a volumetric pipette is intended for a defined volume. Use a pipette aid; never pipette by mouth.
Confirm that the vessel is suitable for the heating method. Warm glass gradually, keep flames or hot surfaces away from thick sections and damaged areas, and do not place hot glass on a cold or wet bench. Allow heated items to cool in a protected location and mark or segregate them until they can be handled safely.
Never heat a closed system unless the apparatus was engineered for the expected pressure and includes suitable controls. Point open test tubes away from people, use a holder, and move the tube through the heat rather than concentrating the flame at one point. Select undamaged laboratory test tubes that fit the rack, holder, and planned temperature exposure.
Vacuum can make a flawed vessel implode; internal pressure can send fragments and contents outward. Use only glassware designed and rated for the condition. Inspect it immediately before setup, install a shield where failure could reach personnel, and keep faces and hands out of the likely fragment path. Clamp the apparatus without creating point pressure, and change pressure slowly.
Protect vacuum lines with suitable traps and verify that pumps, tubing, joints, and receiving vessels are compatible. Do not evacuate ordinary flat-bottomed glassware or a vessel with an uncertain rating. For pressure work, use engineered equipment with defined limits and relief provisions rather than adapting routine laboratory bottles.
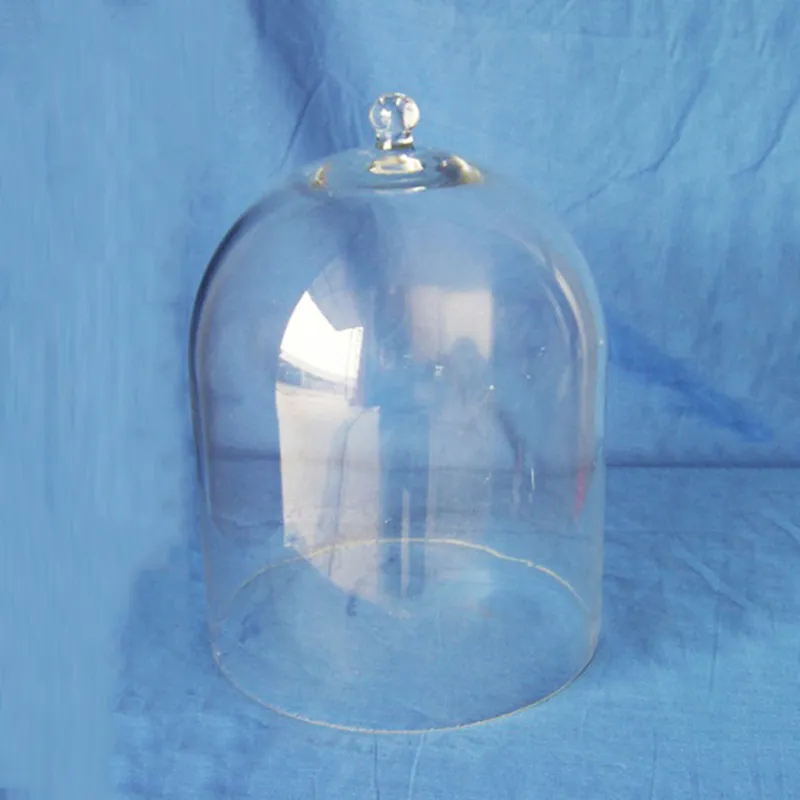
For laboratories sourcing a glass enclosure, the Wincom Big Bell provides a relevant inquiry starting point within Wincom's laboratory glassware range. Before using any bell jar for vacuum work, ask Wincom to confirm the exact dimensions, glass composition, wall and flange condition, compatible base or gasket, maximum vacuum rating, inspection criteria, and replacement availability. Do not infer vacuum suitability from the bell shape alone. This specification check connects the product choice to the actual load and helps the laboratory write a defensible acceptance checklist.
Carry multiple pieces in a tray or cart with raised edges. Use two hands for large vessels and never carry glassware by a stopper or sidearm. Store heavy pieces below shoulder height, separate rims, and use racks that support the correct diameter. Avoid stacking unless the product and rack were designed for it.
Empty and identify residues before washing. Follow the chemical's handling procedure and do not mix incompatible residues in a sink or wash bath. Use brushes sized for the vessel; forcing an oversized brush can break the bottom. Let cleaned glassware drain in stable racks. Store compatible chemicals in correctly selected reagent bottles, with labels and closures suited to the contents.
Stop work, warn nearby personnel, and isolate the area. If chemicals or biological material are involved, follow the relevant spill procedure and safety data before cleanup. Do not pick up shards with bare or gloved hands. Use tongs, forceps, a brush and dustpan, or another designated tool, then place fragments in a rigid, labeled broken-glass container. Contaminated glass may require a separate hazardous-waste or sharps route under local rules.
Check beyond the visible break point: fragments can travel under equipment or into clothing. Seek medical evaluation for cuts, embedded glass, chemical exposure, or eye contact according to the laboratory's emergency plan. Record the incident and the immediate cause, but also examine the system cause, such as an unsuitable vessel, missing shield, crowded bench, or unclear disposal route.
| Control point | What to verify | Accident reduced |
|---|---|---|
| Product selection | Material, dimensions, tolerances, intended heating, pressure or vacuum use | Thermal fracture, implosion, poor fit |
| Incoming inspection | Chips, scratches, joint fit, stable base, readable graduations | Cuts, leakage, measurement error |
| Workstation setup | Clamps, shields, hose routing, clearance, PPE | Impact, splash, flying fragments |
| End-of-use process | Cooling, decontamination, drying, storage, damaged-item segregation | Burns, exposure, repeat breakage |
Training should include a hands-on demonstration of inspection, tubing insertion, hot-glass handling, cleanup tools, and the laboratory's disposal route. Supervisors can reinforce the procedure with a short pre-use checklist and periodic observation. Procurement teams should request drawings or dimensional data for critical interfaces and document operating limits in the purchase specification.
Share the application, dimensions, operating temperature, chemical exposure, and any pressure or vacuum requirement when requesting a quotation. Wincom can then respond to a defined use case rather than a product name alone.
Contact Wincom about laboratory glasswareRemove it from service. A chip creates a sharp edge and a stress concentration that can worsen during handling, heating, or pressure change. Follow the laboratory's rejection and disposal procedure rather than attempting an informal repair.
Use the manufacturer's stated intended use and rating. Shape alone is not enough. Verify the glass type, geometry, wall condition, compatible accessories, maximum vacuum, shielding needs, and inspection interval before operation.
Keep people away, manage any contamination first, and collect fragments with tools rather than hands. Deposit them in the designated rigid container. Apply local hazardous-waste or sharps rules when the glass is chemically or biologically contaminated.
Inspect it before every use and again after cleaning when damage is easier to see. High-risk vacuum, pressure, or heating applications may need a documented periodic inspection schedule based on the manufacturer's instructions and the laboratory risk assessment.
E-mail: [email protected]
Tel: +86-731-84176622
+86-731-84136655
Address: Rm.1507,Xinsancheng Plaza. No.58, Renmin Road(E),Changsha,Hunan,China


 EN
EN
 af
af
 es
es
 ar
ar
 tr
tr
 sw
sw
 pt
pt
 th
th
 ur
ur
 bn
bn
 ne
ne
 vi
vi
 km
km
 lo
lo
 de
de
 ru
ru
 fi
fi
 nl
nl
 fa
fa
 fr
fr
 ko
ko